 This is my Baptism Box, which I use when preparing children age 3-10 (ish) for baptism. These are children who are going to be ‘answering for themselves’ – ie. making their own baptismal vows – but will also usually have Godparents who will make those promises with (not for) the child. I usually do baptism preparation 1:1 with the child’s parent(s) present as well.
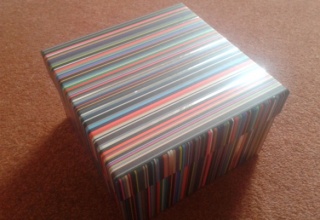
It is brightly coloured and a bit shiny – it certainly looks like something special. I only use it for this purpose, so children won’t have seen it before. It is about 25cm square.
In my baptism box are:
- white cloth
- bowl
- jug
- flask of water
- doll
- candle
- matches
- oil stock containing oil
- Bible (age-appropriate)
- book about baptism (age-appropriate)
- photo of a baptism (preferably of similar-aged child)
I explain that the baptism box contains special things to help us think about this special occasion. I get them out a few at a time, speak to the child about the part of the service they relate to, and invite them to ‘wonder’ with me about what the various objects and words might mean or remind us of.
First, I spread the cloth on the floor/table and get out the water, jug and bowl. I pour the water into the jug, and invite the child to pour it into the bowl. We discuss what we can use water for (washing, drinking, growing plants, etc). Many children will comment that water is necessary for life. Then we discuss bible stories with water in them – creation, flood, exodus, baptism of Christ, wedding at Cana, walking on water, etc.
Next I introduce the doll and invite the child to choose a name for him/her. We discuss the importance of names. The child might know something about their own name – what it means, or who they are named after. Then I demonstrate baptising the doll, and invite the child to have a go. I often ask the child how they think the doll feels about being baptised – this is often an opportunity for them to talk safely about how they themselves feel.
Then I get out the candle and matches. We talk a bit about light and fire, and what they might mean or do or be for, touching on the idea of the Holy Spirit being represented by fire, and Jesus being the Light of the World. I light the candle and give it to the child to hold. There is usually a bit of silence at this point. Then I introduce the words “shine as a light in the world to the glory of God the Father” and we discuss what that might mean. The child blows out the candle, and we talk about the idea that the light of Christ cannot be blown out.
Next we get out the oil stock. The child might try to guess what is inside. Then I invite them to open the stock, touch the oil, and guess again. I demonstrate making the sign of the cross on the doll’s forehead, and invite the child to do the same. Again, I ask how the child thinks the doll feels.
Then I explain that there are some special things about baptism that we can’t see – these are the special words we use. We look together at the key words used and the promises made at baptism. We discuss what promises the child will make at their baptism, and what promises God makes to them.
Finally I get out the books – a bible and a book about baptism, both appropriate to the child’s age and/or reading ability. We might read the book about baptism (or part of it) together. I will leave the books for the child and their family to borrow (or, if there seem to be not many books in the house, to keep).
I then invite any questions from the child and their parents(s) which often leads to more discussion.
By the end of the session, the set-up looks something like this:
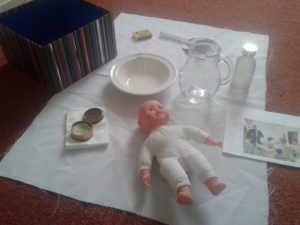
Then I invite the child to help me pack everything back into the box, remembering what each thing is for as we put it away.
This session is supplemented by a rehearsal on the day before the baptism, at which we will recap the key words and symbols, as we walk through exactly what will happen on the day of the baptism. This includes another opportunity to ask any questions.
Ruth Harley, High Wycombe